Locations typically describe the facilities in your organization. If you manage a school district, your Locations will most likely be your individual schools (Dude High School, ABC Elementary School, Administration Building, etc.). If you manage a higher education organization, your Locations may be your campuses (West Campus, Central Campus, etc.).
For organizations that have multiple campuses, each with multiple facilities on them, you may decide to use Locations to describe the campus. Then you can use Buildings to describe the structures on each campus. *Note: There are user roles in Incident that can be restricted to the Location level, but not the Building level.
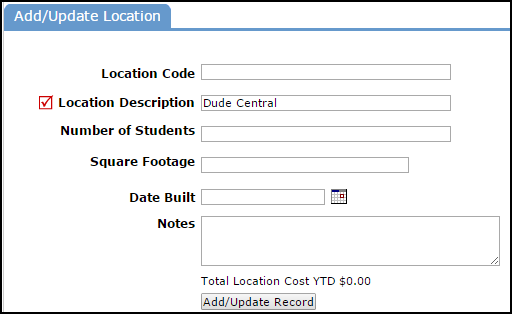
How to Add Locations
- Click on the Add link in the Actions Menu.
- Click the Locations link. Fill in the following fields on the Add/Update Location screen:
- The Location Code is only used for database purposes and does not appear on any pages or reports. If you do not enter a Location Code, the system will generate one for you.
- Enter the Location Description (the name of the facility or campus).
- Enter the Number of Students, Square Footage, Date Built and any Notes for this location. This information is not required and can be added at any time.
- Click Add/Update Record to save.
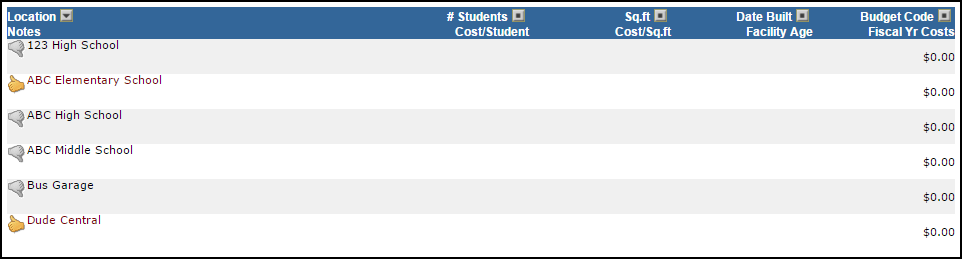
How to View Locations
- Click the List link under the Actions Menu.
- Click the Locations link.
The Location list is automatically populated if other Dude Solutions applications are in use by your organization. Locations with a yellow thumbs-up ( ) are active and ready for use within the application. Locations with a gray thumbs-down (
 ) are inactive in the account and unavailable for use in the application.
- To activate a Location, click on the gray thumbs-down icon ().